
Inter-Site Connectivity
Inter-site connectivity refers to the connections between sites. This includes paths, which represent a full connection between two sites; and segments, individual sections of a path.
An administrator can create paths and segments using the Inter-Site Connectivity feature.
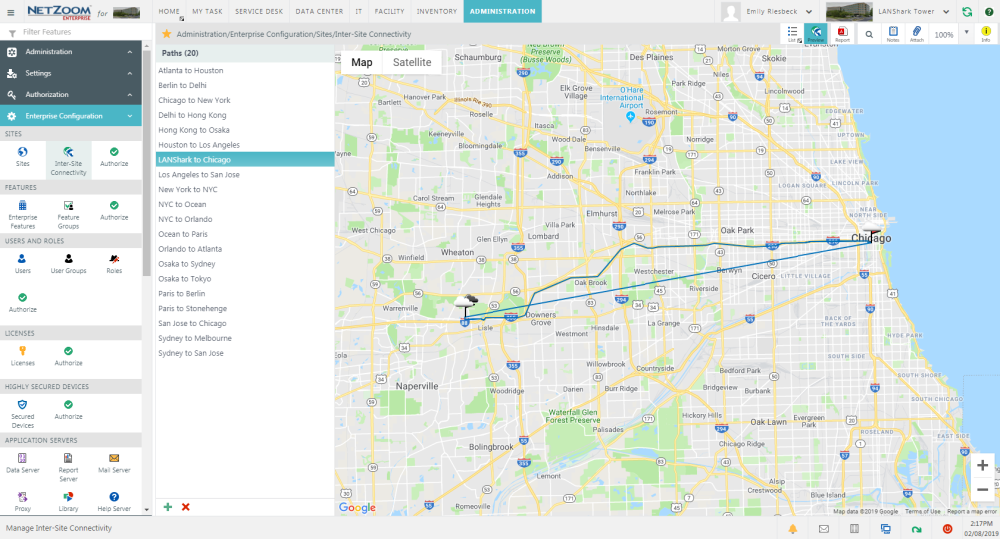
Path: Administration/Enterprise Configuration/Sites/Inter-Site Connectivity
The Inter-Site Connectivity feature has two panes. The Paths pane lists paths between sites. The Details pane lists the properties of a selected path.
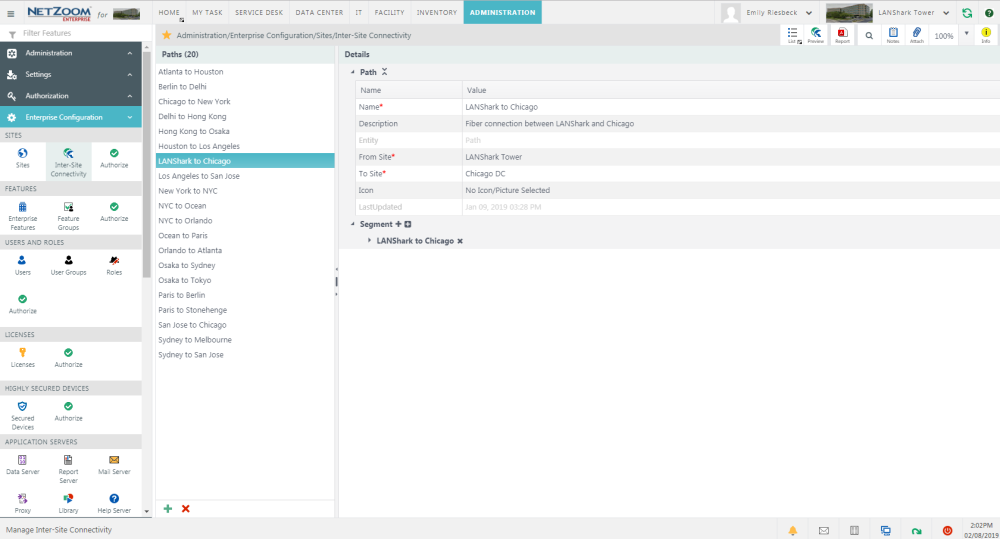
Creating a Path
- To create a path between two sites, click the
 icon at the bottom of the Paths pane. A blank form will appear in the Details pane.
 - Fill out the form. The following fields are available:
- Name: The name of the path.
- Description: A description of the path.
- From: The site and node that acts as a start point of the path.
- To: The site and node that acts as an end point of the path.
- Icon: The Icon associated with the path.
- To select a site and node using the From or To fields, click the respective field. The Site Explorer pane will appear, displaying a drop-down list of sites and the infrastructure of the selected site in a tree view.
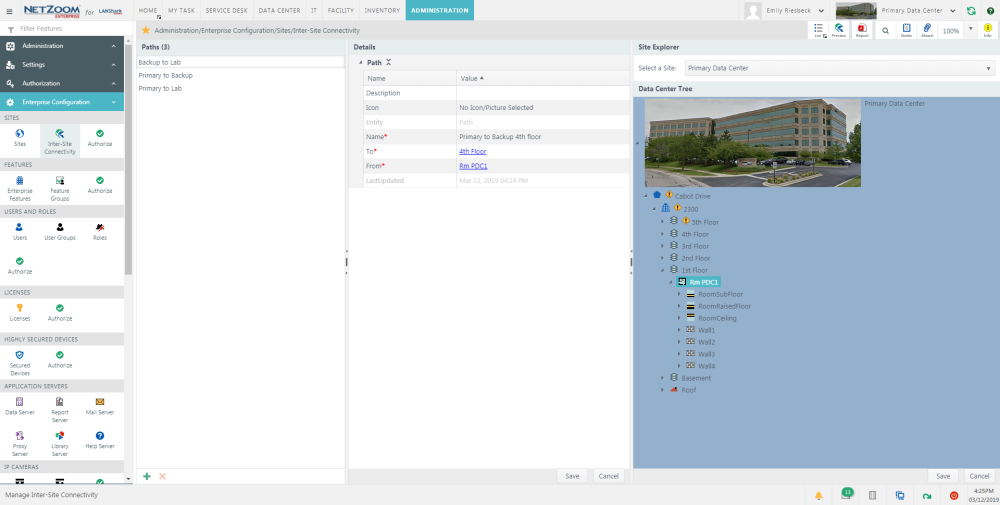
- Select the site and node you want to set as the “Start” or “End” point of the path, using the Site Explorer.
- Click the [SAVE] button at the bottom of the explorer pane to save your Start or End point of the path.
- When you are finished with your path, Click the [SAVE] button at the bottom of the details pane. The Path will be saved and added to the Paths pane.
Adding a Segment to a Path
- Once you have created a path, you can map it using Segments and Waypoints. To add a segment to a path, select the path you want to add a segment to in the Paths pane. That path’s properties will appear in the Details pane.
- Click the
 icon next to Segment. A blank Segment form will appear.
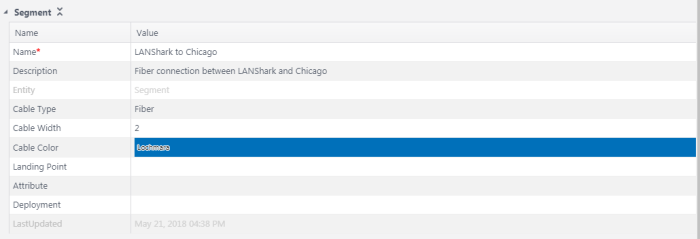
 - Fill out the form. The following fields are available:
- Name: The name of the segment.
- Description: A description of the segment.
- Cable Type: The type of cable that the segment uses.
- Cable Width: The width of the cable the segment uses.
- Cable Color: The color of the cable the segment uses.
- Landing Point: The type of landing point the segment uses. This will determine the segment’s icon on the inter-site connectivity map.
- Attribute: the attribute of the segment. This can be long-haul fiber, back haul fiber, short haul fiber, or other.
- Deployment: the deployment of the segment.
- Click the
 icon. The segment will be saved.
Adding an Existing Segment
You can also add existing segments, using the same segment in multiple paths.
- Click the
 icon next to the Segment field. The Add from existing entity nodes form will popup.
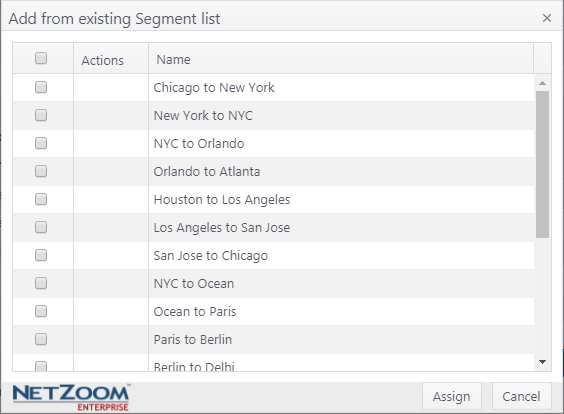
- Check [X] the segments you want to add from the form.
- Click the [ASSIGN] button. The selected segments will be added to the path.
Deleting a Segment
- To delete a segment, click [X icon] next to the segment you want to delete. A popup will confirm your selection
Adding a Waypoint to a Segment
Waypoints are coordinates you can add to your segments, to exactly map the physical path of a segment from the starting point to the end point.
- To add a waypoint to a Segment, navigate to the segment you want to add a waypoint to and click the icon next to Waypoints. A blank form will appear.
- Enter the latitude and longitude. Note: this must be properly formatted.
- Click [save icon]. The waypoint will be saved to the segment.
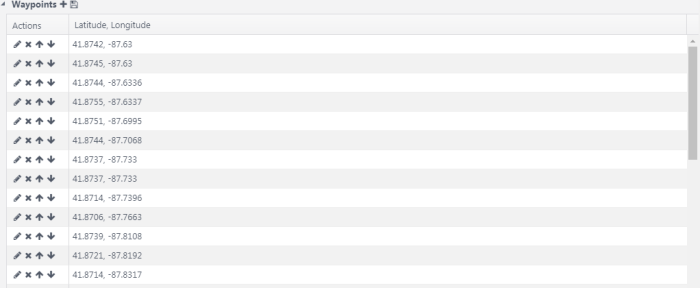
Waypoint Controls
-
 : edits the waypoint
 -
 : deletes the waypoint
 -
 : moves the waypoint up in the list
 -
 : moves the waypoint down in the list.
Viewing the Connectivity Map
Clicking QA: Inter-Site Connectivity Map will display a Google map focused on the selected path. Note: A Google Maps instance must be properly configured for this to work.
Available Quick Actions
- List View
- Inter-Site Connectivity Map
- Reports
- Search
- Add Notes
- Attach a File
- Zoom
- Quick Help
Last Updated: Thursday, August 13, 2020
NetZoom, Inc.