
Attach a File

You can attach a file to items using QA: Attach a File. This quick action is available in most features.
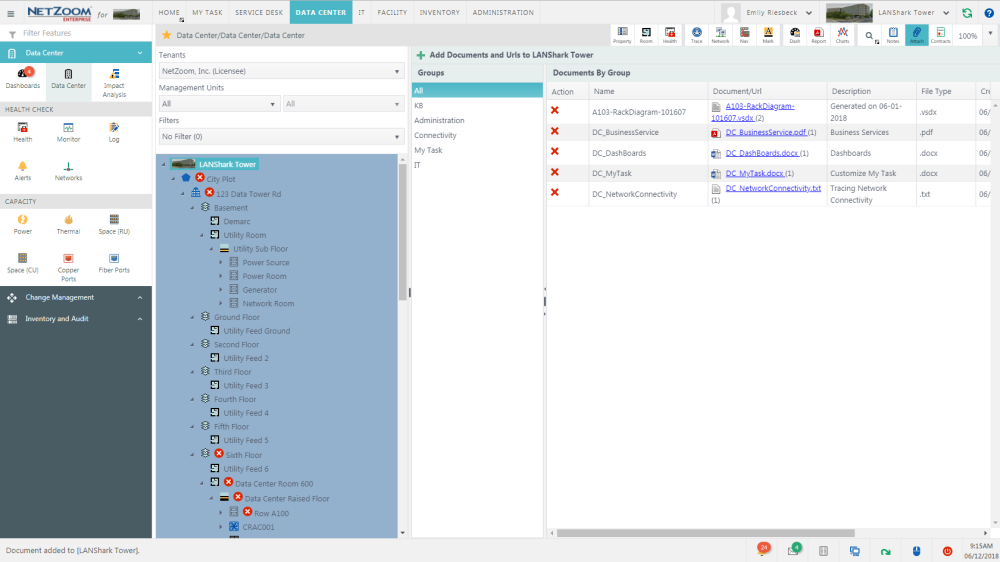
- Select the item you want to attach a file to.
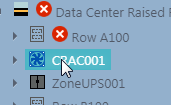
- To attach a file to an item, click QA: Attach a File. This will launch the Attach a File user interface showing any files previously attached to an item or node.
- Click the
 icon. The Add Documents and URLs form will pop up.
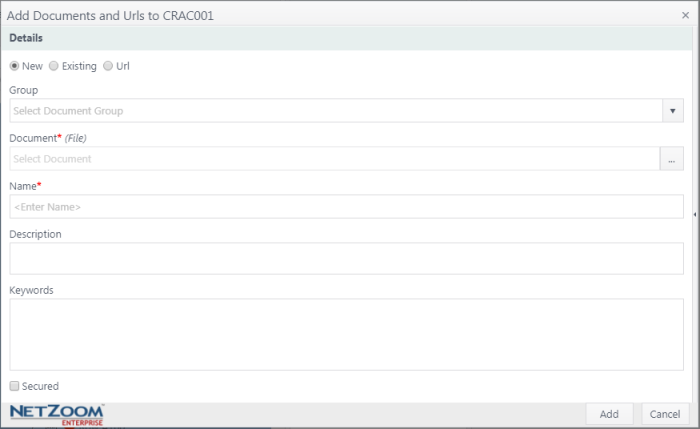
- Fill out the form. The following fields are available.
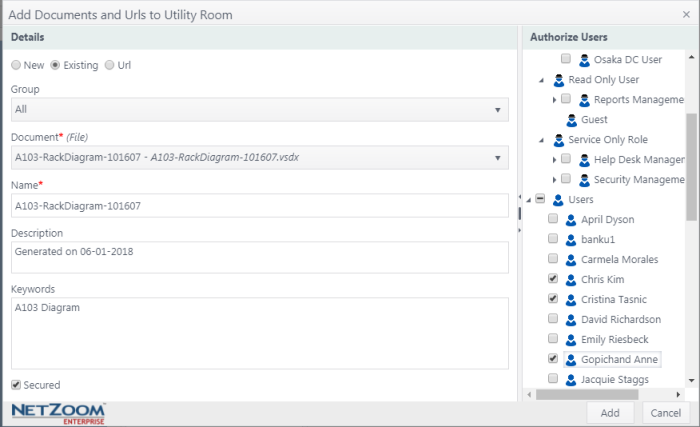
- New/Existing/URL: Check to choose whether the document will be a newly uploaded one, a document that has already been uploaded to NetZoom or a URL.
- Group: Select the document group that the document will be added to. For new and URL, you can select an existing group from the drop down. If a new group is entered, it will automatically be created. For an existing document, you must select the group of the existing document you want to add.
- Document (new and existing only): for new documents, this field will open a search window for you to select the document you want to upload. For existing documents, this will list documents in the selected group. A list of accepted file types can be found in the Enterprise Settings feature.
- URL (URL only): Enter the URL you want to add in this field.
- Name: The name of the document
- Description: A description of the document
- Keywords: Keywords that, when searched, will display the document in results.
- Secured (new and existing only): check [X] to secure your document so only authorized users can see it. If you check this, the Check to Assign to Users pane will appear, allowing you to check [X] the users, roles and user groups you want to be able to access this document.
- Click the [ADD] button. The document will be added to the selected node.
Documents that have been added can be centrally tracked and managed by an authorized user in Document Management.
Last Updated: Monday, December 07, 2020
NetZoom, Inc.