
Icon Groups
Using this feature, icons can be grouped for easy access. Users can add a new group, delete an existing icon group and even clone a Group.
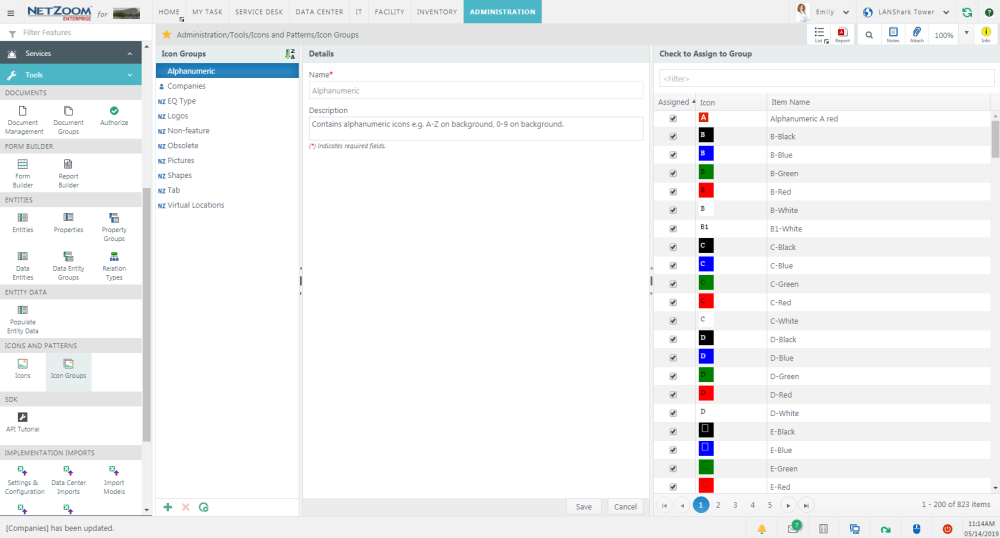
Feature Path: Administration/Tools/Icons and Patterns/Icon Groups
The Icon Groups feature has three panes. The Icon Groups pane lists icon groups. The Details pane lists the properties of a selected group. The Check to Assign to Group pane lists icons, along with a check box to assign them to the selected group.
Creating an Icon Group
- To create an icon group, click the
 symbol at the bottom of the Icon Groups pane. A blank form will appear in the Details pane.
 - Enter a name for your icon group. A description is optional.
- Click the [SAVE] button to save changes.
Adding Icons to a Group
- To add icons to a group, select it in the Icon Groups pane.
- In the Check to Assign to Group pane, check [X] the icons that you want to assign to the group.
- Click the [SAVE] button to save changes.
Editing an Icon Group
- To edit an icon group, select it in the Icon Groups pane.
- Make any desired changes in the Details pane.
- Click the [SAVE] button when finished.
Cloning an Icon Group
- To clone an icon group, select it in the Icon Groups pane and click [
 .] The Enter Name form will pop up.
 - Enter a new name for your icon group and click the [OK] button. The group will be cloned and added to the Icon Groups pane.
Deleting an Icon Group
- To delete an icon group, select it in the Icon Groups pane and click the red x icon. A popup will confirm your selection.
- Click the [YES] button. The icon group will be deleted.
Available Quick Actions
Last Updated: Monday, January 25, 2021
NetZoom, Inc.