
BMC Remedy
NetZoom integrates with BMC Remedy for asset tracking and change management. This integration allows NetZoom and Remedy to share data, events and changes. Data property changes are automatically synchronized between the applications to maintain consistency and minimize errors. This integration requires configuration steps in both applications.
Feature Path: Administration/3rd Party Integration/CMDB/Remedy
The Remedy feature has two panes. The Instances pane lists BMC Remedy instances that have been added to NetZoom. The Details pane lists the properties of a selected instance.
In order to integrate BMC Remedy, the Internal or external Remedy Portal URL and corresponding account setup are required.
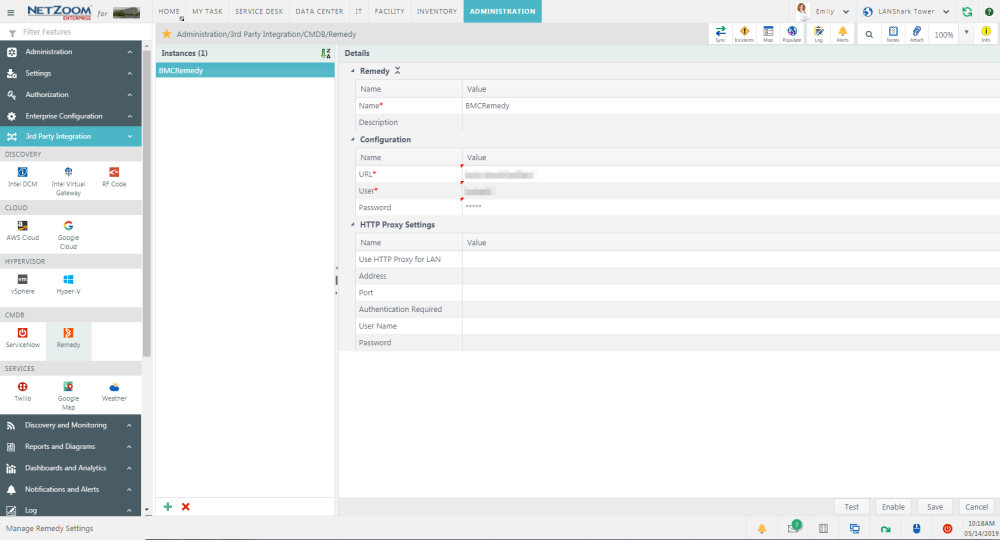
Adding a Remedy Instance
- To add a new Remedy instance, click the
 button at the bottom of the Instances pane. A blank form will appear in the Details pane.
 - Fill out the form. The following fields are available:
- Name: The name of the instance.
- Description: A description of the instance.
- URL: The Remedy Instance URL.
- User: The Administrative Account associated with Remedy.
- Password: The administrative account’s password.
- Use HTTP Proxy for LAN: Check if a Proxy is needed
- Address: The IP address of the Proxy.
- Port: The port number for the Proxy.
- Authentication Required: Check if authentication is required.
- User Name: Username to use the Proxy.
- Password: Password to use the Proxy.
- Click the [SAVE] button to save the instance.
Enabling an Instance
- To enable an instance, select the instance in the Instances pane and click the [ENABLE] button. Enabled instances will have a
 symbol beside them.
 - If an instance is already enabled, the Enable button will be replaced by the [DISABLE] button.
- The [TEST] button can be used to test the connection to the instance.
Available Quick Actions
- Sync
- Incidents
- Map Properties
- Populate Site
- Log
- Alerts
- Search
- Add Notes
- Attach a File
- Zoom
- Info
Last Updated: Monday, December 14, 2020
NetZoom, Inc.